3.4. Working with Tasking Manager
Course Objectives
By the end of this you should be able to:
- Understand how to navigate and operate the tasking manager
- Understand how to teach people to use the tasking manager to map with OSM
The following materials are designed to assist project managers and others leading trainings and workshops. If you are an individual interested in learning how to map with OpenStreetMap, please visit LearnOSM.org.
Learning Activities
The HOT Tasking Manager is a mapping tool designed and built for the Humanitarian OpenStreetMap Team’s collaborative mapping process in OpenStreetMap. The purpose of the tool is to divide up a mapping project into smaller tasks that can be completed rapidly with many people working on the same overall area. It shows which areas need to be mapped and which areas need the mapping validated.
For information on Managing and Creating Projects on the HOT Tasking Manager, fill out a form here, http://bit.ly/TaskManagers , to receive training and permissions to become a TM Project Manager.
Getting Started with Tasking Manager
Skills and Technology Needed
- Computer
- Internet connection
- OSM account
Head to the HOT Tasking Manager website: https://tasks.hotosm.org/. To sign in, click on the ‘Log in’ button in the top right corner of the page. Once you click on the login button a popup will appear with the OpenStreetMap login form. Please enter your OSM username and password.
If this is the first time you are logging into Tasking Manager with your OSM username and password from the device you are using, an authorisation message will appear. Click ‘Grant Access’ so that your OSM login details will sync to the Tasking Manager. You will notice that your username now displays in the upper right hand corner of the page.
Finding a Project
The ‘Explore Projects’ button along the top of the Tasking Manager will display a list of current mapping projects as shown below:
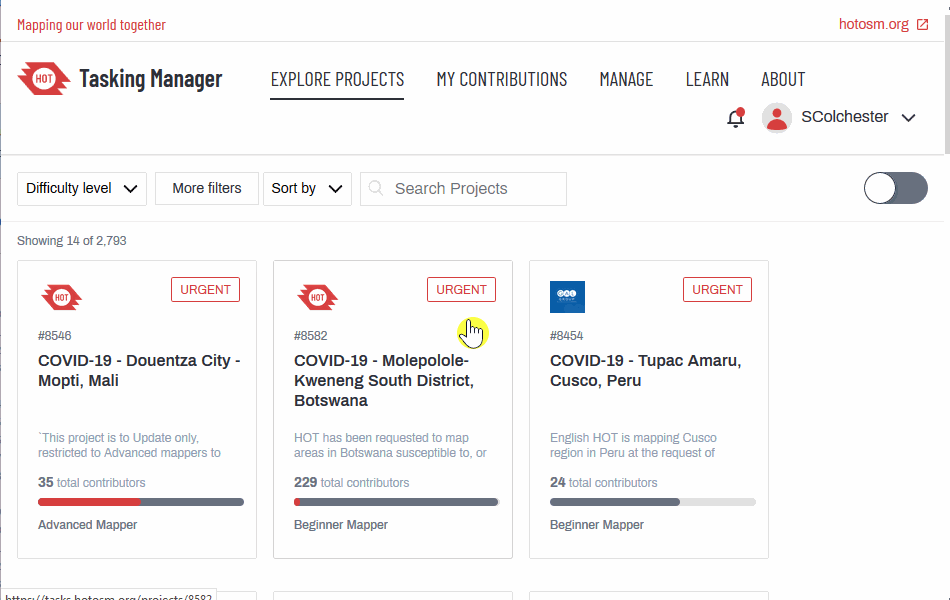
Each project listed will describe:
- The urgency of the project
- The project number and name - this will often include the location, the type of humanitarian response, and the focus feature being mapped
- Any important information e.g. type of mapper needed / experience level
- A description of the project
- The organization requesting the project
- The category of the project
- The level of experience a mapper needs to contribute
- The percentage of the project mapped so far (dark grey in the progress bar)
- The percentage of the project validated so far (red in the progress bar)
- The total number of contributors
If you have a specific project to contribute to, you can search for it in the sidebar to the left of your screen. You can search by:
- Project name or number
- Level of mapping difficulty
- Organization
- Campaign
- Location
- Type of mapping (features being mapped)
You can also view the list of projects on the map. You can switch the map on and off by selecting the toggle in the upper right hand side. Projects are clustered together on the map into circles which display the number of projects in a particular area.
You can zoom into an area to view a breakdown of projects in a particular region.
Selecting a Project
Once you have decided which project you want to map, you can click on a tile to open a project page. This page provides specific details on the project objectives and requirements.
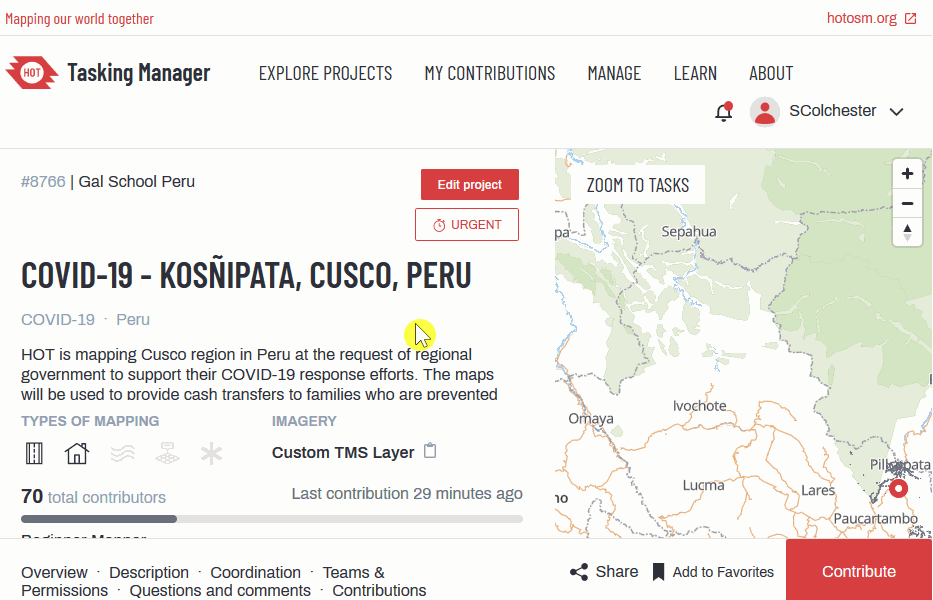
Underneath the project description you will see a series of icons. The bold icons indicate which entities to map (which features e.g. buildings, roads).
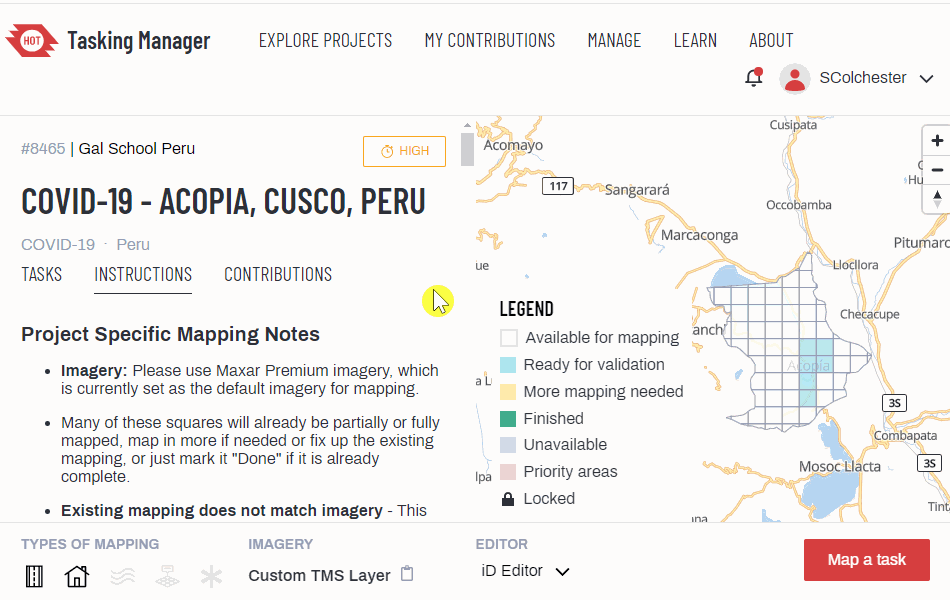
Once you select ‘Contribute’ more detailed instructions are provided, with specific guidelines (mapping notes). The Project Specific Mapping Notes section gives detailed instructions on the imagery to use, how to trace specific features, and how to tag features.
Mapping features which are the focus point of the project are explained in further detail underneath the Project Specific Mapping Needs. These feature specifications will describe common tags used for each main feature and provide tips for mapping that feature.
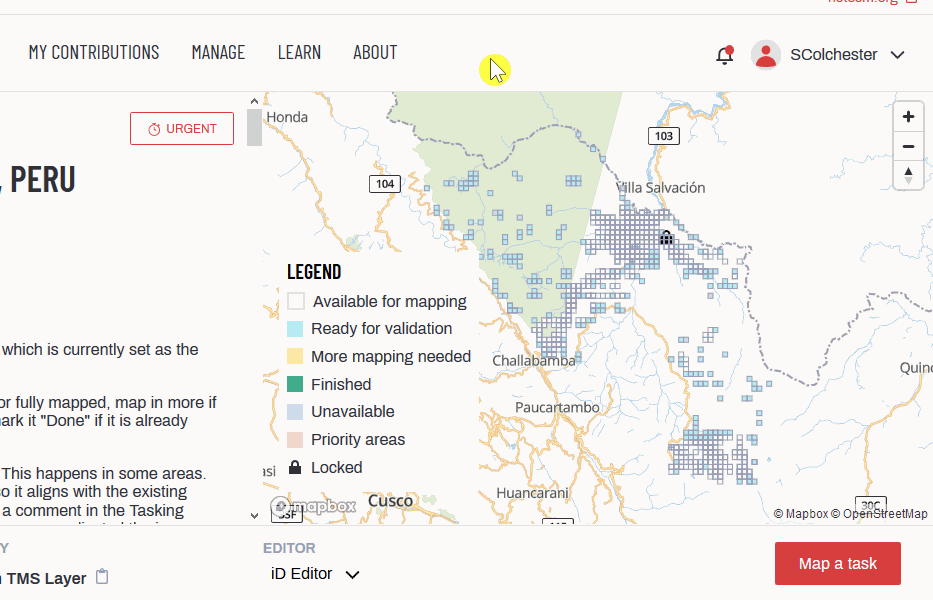
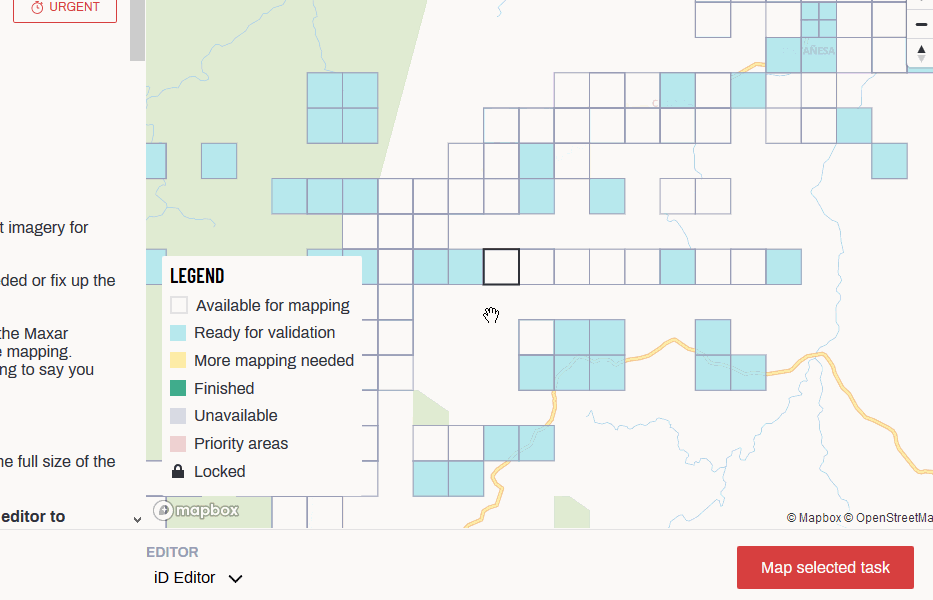
The overview map on the right-hand side of the project you have selected is split into squares which are colour-coded depending on the completion of the mapping in that square. The colors represent the following:
- White: a tile is ready to be mapped and needs to be completed
- Blue: a tile has been mapped and is ready to be validated
- Yellow: a tile has been invalidated. This could be because an area was not fully mapped or multiple errors need to be corrected
- Green: a tile has been validated. This means that the mapping in this area has been quality-checked, edited if necessary, and approved. Validators will leave comments next to a tile to show the changes they have made
- Grey: a tile has been marked as having bad imagery
- Black padlock: a tile is locked by another user
- Red padlock: a tile is locked by you
Click on a white tile to begin mapping an area that is in need of mapping. When you click on a white tile the outline of the square will turn bold and the button in the lower right hand corner will display ‘Map selected task’.
Prior to selecting a task you may also click ‘Map a task’, this will allocate one randomly to you. You can also specify the editor you will be using. Select ‘JOSM’ or ‘iD Editor’ from the popup list before you start mapping.
[Quiz] Check Your Knowledge
-
In order to be able to create a project in the tasking manager, you need to become a project manager by submitting the request and receive training and resource as TM Project Manager.
a. True
b. False
-
Each project in the Tasking Manager will describe:
a. Project description
b. Project priority
c. Total number of contributors
d. All correct
Answer: 1. A | 2. D
Activity Checklist
By the end of this section, you should be able to:
- Explain/teach the use of tasking manager to other
- Navigate the tasking manager
Additional resources
The following presentation(s) can be used to lead a training or workshop.
Read
Video